
Monogame SnowFlakes - 2015 #FsAdvent Entry
Welcome to my #FSAdvent blog entry for the F# Advent event 2015 and thank you Sergey Tihon for organising it!. Last week Phillip Trelford introduced me to Monogame by way of a worked example using sprites.
So I decided building on his help wasn't enough, I thought I'd pinch a little more of his code and build a simple snowflake program. This post perhaps fits in nicely with Steve Pemberton's who had time to work out how to do this in WPF but not Monogame.
One nice selling point with F# is it's pragmatic paradigm programming practical philosophy (I ran out of P words!). In other words, I get to abuse mutable values, override some OOP stuff whilst working with more functional types. This makes using the language with Monogame quite accessible.
The complete solution is either as a Gist or you can have the visual studio solution. For the blog, I've omitted much boilerplate, see the full gist above to get your own working sample!
Stuff I tried before Monogame
I started looking at a graphics idea a few weeks back when Sergey announced the #FsAdvent. In between prepping for job interviews (in C#!) and other things, I started looking at WriteableBitmapEx (see sample) as well as SlimDX.
Whilst this led down some interesting by-ways, I didn't master how to do actual animation this way in the time I had left. This led to a Twitter exchange with Phil who did my ego the world of good by solving the problem on a train journey; thanks Phil :). However, he also kindly gave me the starting point for using Mono for the same purpose. The work here has been built from that starting point. Below is a snip showing the fun use of some inline shader language code for those that are interested:
Text to Bitmap to Memorystream.
A nice way to build the required textures is first create a bitmap then save it to a memory stream.
The Flakes!
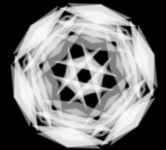
Here I've used three different routines each returning a bitmap saved as a stream. The first is a P-Flake - generate random polygons then reflect them to produce a flake; it uses a transparency of 128 to achieve the ghost effect.
The second uses straight forward TextRender.DrawText to take some text and plot it onto a bitmap. Here, the fake 3D effect is achieved zipping up a couple of ascending lists to produce co-ordinates.
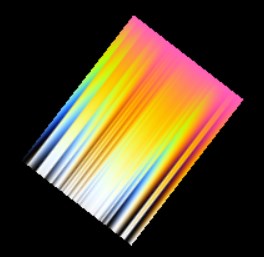
The third is simply accessing a random art generator picked up from Phil Trelford's random art session at Cambridge.


Code for the P-Flake
The 3D F# code
Nested Flake Type
Each instance of the flake type is a bit of a cheat as I nest a second flake within it with it's own spinfunction (some flakes spin the other way) and other values. Version 2 of this program needs to wrap up the texture creation and present a simpler type. But simplicity in code is usually an exchange of time available to achieve it. I ran out of that!
The nested record approach isn't the prettiest way to do this, but I didn't want multiple arrays of flakes. This all started when I realised that for each flake type, I may have to have a new texture2d. It occurred to me I wanted unique snowflakes, NOT a cache of a few different ones to be repeated. So, the innerflake here is where I store my new flake.
Here I also setup basic screen dimensions and implement float2 random number generator that takes a min & max.
Start the Monogame engine and handle keys
Setup the monogame type and initiate the content. Here the various method overrides give you access to the Loadcontent, Update and Draw methods of the game instance.
I wanted to give folks a chance to play with the snow and got irritated with all the IF statements needed to handle keys. To do this, you need to get the keyboard state during the update operation. Adding protection to my forces here added code irony to my statement regarding IFs too :).
Force Control
Here we can alter the density of snowfall by reducing the range of random numbers we generate and test. Need some actual flakes now, each with their own spinfactor, x, y, wind and velocity. We also get a separate position for the F# flake and the inner P-Flake here. Add them to the array of flake objects - somewhat misnamed now that I've added a second structure representing a P-Flake, position and other values.
Here a simple random function to decides whether to give you a P-flake or an R-flake as your inner flake.
Are you in the picture?
Increment our flakes positions: First partition the flakes into onscreen or not giving us two lists. Remove those in the second list whilst we also increment the positions of the ones that are still onscreen.
Time to Draw
We have our flakes, we have means of removing flakes, now have to do make sprites out of our flakes. Here I cheat a little with the F# flake. I wanted to pre-draw the F#'s however after spending some time on it, I hadn't got it worked out in time for this blog. The approach below works well enough, though you'll see I've added the same sprite 6 times, rotating the position each time giving us a reasonable delusion of a six sided shape. One side effect of this approach is it was trivial to allow the character used to be altered, see the controls above. Randomizing the layer depth was another approach I took to try and make the flakes slightly more natural.
It took me a while to get my mind around the fact that here during each Update call, we are incrementing various values for each item in the array - rotation, angle, downward movement - drawing it, then moving to the next one.
Monogame Brief Basics
Having never used monogame before, I've had to hack about to work out what happens when. Here is a rough simplistic outline of it's structure:
Page built manually with the following tools:
Me: